
QuickTime VR Overview
By: Mike Kimball - Revised: 2006-06-21 devinIntroduction
This page contains a basic overview, software & hardware suggestions, and examples of QuickTime VR scenes.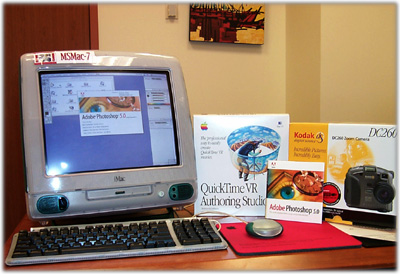
The following software/hardware was used to create the QuickTime VR scenes...
 QTVR Authoring Studio (link dead) - Software to create create VR scenes
Hardware
You'll need a sturdy tripod, and a good digital camera. I suppose using a regular film camera would be possible, if you want to take a bunch of pix and then send them off to be developed, then scan them (making absolutely sure they are straight), then pray that they printed them right so that your alignment will be correct.... Kodak DC260
There are many reasons I chose this, with all the other good cameras out there in the sub-professional category (i.e. less than $1000). The two most important items were:
- Image Quality
The Kodak can take pictures at up to 1536x1024 pix/inch, it features a 3x zoom with a 2x digital zoom, auto everything, and had the best reviews of any other camera in its category. I have been very happy with the clear, sharp images I've been able to get.
- USB Support
I've done the QuickTake 200 serial port download. Too slow. With USB you can download over twenty 1536x1024 images from your Kodak in 30 seconds.
 Bogen tripod and QuickTime VR Head (links dead)
A stable, sturdy tripod, and a head that has indexed rotation and a bubble level - it's too hard to be accurate otherwise. Also, the QuickTime VR Kit is capable of mounting portrait as well as landscape for more flexibility.
 iMac
iMacAs for your computer, something with a fast processor and lots of RAM is always nice. You'll need a USB port if you want fast downloading of images. With an iMac or even a G4 tower, the camera cable plugs into the left USB port on the keyboard.

From Apple's site:
"QuickTime VR is Apple's award-winning photorealistic cross-platform virtual reality technology that makes it possible to explore places as if you were really there! All major applications that play QuickTime movies can also play QuickTime VR movies.For more information, click here. (link dead)
"Apple QuickTime VR Authoring Studio software lets you create interactive virtual-reality scenes with point-and-click simplicity. It takes full advantage of the intuitive Mac®OS interface to help you easily turn photos and computer renderings into attention-getting 360-degree views. QuickTime VR Authoring Studio is a powerful one-stop solution for producing all kinds of QuickTime VR content."
I use Photoshop for anything to do with editing graphics. In this case I use Photoshop for two things:
- Downloading the images using the Digita Desktop Acquire plug-in, and
- Resizing the images
I take pictures at the maximum resolution and image quality (you can always reduce them later, and even after running the pix through the Photoshop wringer they will still look better than pix that started at lower resolution). When stitching, the VR Authoring software tends to hang if the pix are too large, so be careful with images above, say, 768 x 512.
The Process
There are two basic kinds of images that you can make with QuickTime VR:- Panorama images, those that rotate in one spot, looking "out"; and
- Object images, those revolve around one spot, looking "in".
Next, you have to decide whether to do full 360-degree images, or partial images. Usually, it is panorama images that can occasionally look better without the full 360-degree rotation, particularly in small spaces with a limited angle of visual aesthetic interest. The point of an object image is usually to show as much detail as possible, hence using full 360-degree horizontal rotation and occasionally multi-level vertical rotation as well.
Once you have planned out your image content, you have to shoot it. Make sure your tripod is level, and that you take pictures at the correct degree of rotation (30 degrees if mounted landscape, 20 degrees if mounted portrait).
When you have your images collected (i.e. put in order and in their own folder - this will save you work later), you are ready to use QuickTime VR Authoring Studio. Open the software, select the kind of file you want to create, and drag and drop the folder into your creation window.
Tips to remember
- Level the tripod
A crooked tripod can cause all kinds of problems: Wherever the seams in your panorama are, that is where lines will break, people will turn into ghosts, objects will disappear, text on signs will be unreadable. Take your time setting it up so you won't have to re-shoot it later.
- Accurate camera rotation
Generally if you have a 35mm camera, for landscape mounting you take a picture every 30 degrees, and for portrait mounting you click every 20 degrees. Be as accurate as possible - the more precise you are, the better your VR will look.
- A word about aspect ratios
The wider the aspect ratio of the finished pano in relation to the width of the individual pix of which it is comprised, the more you will get the "fish-eye" effect. I haven't tried shooting scenes at smaller degrees of rotation to combat this yet. What I notice is that the scenes shot with the camera mounted landscape tend to look more natural. However, this gives a more limited vertical angle of view, so it works best when you have a high depth of field (i.e. not in small spaces).
- High image quality
Pictures taken at high resolution look better, even after being shrunk in Photoshop. I know, it takes longer for the camera to process them, it takes more battery power, more memory card space... But it beats the frustration of a VR that looks crappy even after all the work that went into it, so get some spare batteries, get another memory card, and take your time.
- Camera tips
For QTVR, the auto exposure and auto flash only work well outdoors when the sun is directly above, or in large indoor spaces. Otherwise, you get color and/or exposure variations between pictures, and bright white blotches everywhere. Some rooms won't stitch right even if you know the tripod was totally level. The flash isn't always something you can help - setting it to "fill" usually works ok. But using manual exposure does help quite a bit - find the darkest and lightest parts of the room, then shoot the both of them with different manual exposure settings until you find the one that works for both.
- Using the Kodak Digita Desktop Acquire Software
After you have put the acquire plug-in in your Photoshop folder, open Photoshop and select File:Import:Digita Desktop Acquire, then select the connection type (USB or Serial; if you want this dialog to go away you simply take out the "digita camera serial" extension from your System Folder), and a window for your camera will pop up. Double-click on the slide in the window, and that will open a window containing all of your camera images. Select the images you want and DRAG THEM TO THE DESKTOP.
- Use the correct lens profile
For the Kodak you will have to create a new one. The important details are the focal length, vertical angle of view, and the degree of rotation. My current lens profile settings (these produced acceptable images but I would like to experiment further to increase their accuracy): for the DC260 portrait - 35mm, 55 degrees, and 20 degrees, respectively; for the DC260 landscape - 35mm, 44 degrees, and 30 degrees. If the software stitches the pictures crooked, or if you are getting an error that the selected images total more than 360 degrees, your lens profile is probably the source of your problem.
- Install the latest software updates
For the Kodak camera, using an iMac to connect via USB, you need:
(a) the iMac Firmware Update,
(b) the iMac Update 1.1, and
(c) the latest Digita Desktop Acquire Software from Kodak.
The iMac stuff is on the Mac PD Server (Public Software) in the UUCC Student Labs zone, under Updaters/Patches:iMac, or from www.apple.com (link dead). The Kodak software is also on the PD server, in Systems_and_Print_Drivers:Display & Peripheral:Digita Desktop Acquire Software, as well as at www.kodak.com.
Examples
Active Links- Scott Highton
- Lost Cities Adventure
- Lower Grand Gallery (NOVA Pyramids Visit)
- eVox Productions
- Carolina Coastal Photojournal
- ACLIS Labs VR (University of Utah)
- Apple QuickTime VR
- Apple's QTVR Site list
- Pix Pi, NY
- QTVRWorld.com
- Studio 360
![]() ©2022 - University of Utah -
Marriott Library -
ITS - Apple Infrastructure
©2022 - University of Utah -
Marriott Library -
ITS - Apple Infrastructure
Disclaimer - 295 South 1500 East, Room 1705J, SLC, UT 84112 - 801.581.6494