
dscl
By: James Reynolds - Revised: 2014-01-23 richardPresentation
Watch a presentation of this topic (2007.04.18)What is dscl?
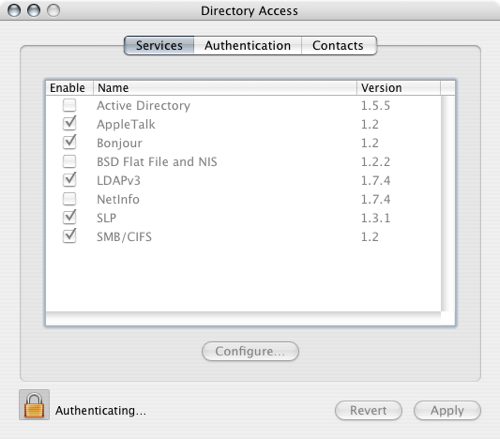
A directory service is an application or set of applications that stores information about users and resources (like computers). Active Directory and LDAP are both examples of directory service applications.Mac OS X 10.4 (client and server) is configured to connect to a directory service via the application "/Applications/Utilities/Directory Access.app" (other versions of OS X may name the application differently). By default Mac OS X is runs a local directory service that is configured in the System Preferences Accounts pane on OS X client and in Workgroup Manager on OS X Server.
The dscl utility allows a user to inspect and modify a directory.
This article will show how to connect to a directory service using Directory Access and how to inspect and modify the data in the directory using dscl.
Listing and Reading (Interactive Mode)
When you type thedscl command without any arguments, it will immediately take you to interactive mode. While in interactive mode, you can type commands and it will print the results. Here is an example of some commands: dsclTo leave interactive mode, just type "quit".
ls /NetInfo
ls /NetInfo/Users
read /NetInfo/Users/www
read /NetInfo/Users/www UniqueID
Here is what those commands actually produce:
[computer:~] james% dscl
dscl (v20.4)
usage: dscl [options] [<datasource> [<command>]]
datasource:
localhost (default) or
<hostname> (requires DS proxy support, >= DS-158) or
<nodename> (Directory Service style node name) or
<domainname> (NetInfo style domain name)
options:
-u <user> authenticate as user (required when using DS Proxy)
-P <password> authentication password
-p prompt for password
-raw don't strip off prefix from DS constants
-url print record attribute values in URL-style encoding
-q quiet - no interactive prompt
commands:
-read <path> [<key>...]
-create <record path> [<key> [<val>...]]
-delete <path> [<key> [<val>...]]
-list <path> [<key>]
-append <record path> <key> <val>...
-merge <record path> <key> <val>...
-change <record path> <key> <old value> <new value>
-changei <record path> <key> <value index> <new value>
-search <path> <key> <val>
-auth [<user> [<password>]]
-authonly [<user> [<password>]]
-passwd <user path> [<new password> | <old password> <new password>]
Entering interactive mode...
> ls /NetInfo
AFPUserAliases
Aliases
Groups
Machines
Networks
NFS
Printers
Protocols
RPC
Services
Users
> ls /NetInfo/Users
amavisd
appowner
appserver
clamav
cyrusimap
daemon
eppc
jabber
james
lp
mailman
mysql
nobody
postfix
qtss
root
securityagent
sshd
tokend
unknown
windowserver
www
xgridagent
xgridcontroller
> read /NetInfo/Users/www
_writers_passwd: www
AppleMetaNodeLocation: /NetInfo/root
Change: 0
Expire: 0
NFSHomeDirectory: /Library/WebServer
Password: *
PrimaryGroupID: 70
RealName: World Wide Web Server
RecordName: www
RecordType: dsRecTypeStandard:Users
UniqueID: 70
UserShell: /usr/bin/false
> read /NetInfo/Users/www UniqueID
UniqueID: 70
>
Local vs Network Directory
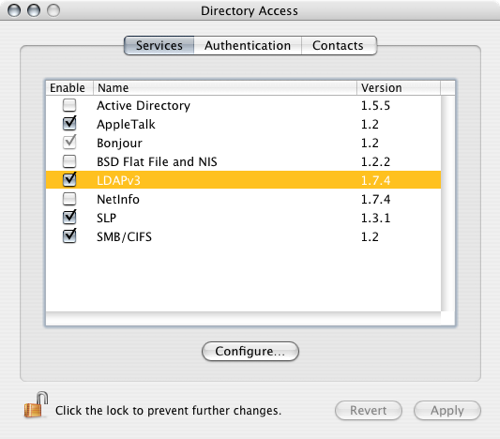
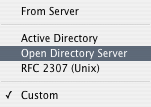
Above, I showed working with the NetInfo node. That node is located on the local machine.It is also possible to work with a network directory. Here are some shapshots showing how to connect to a network directory, specifically Mac OS X Server running Open Directory (OpenLDAP).
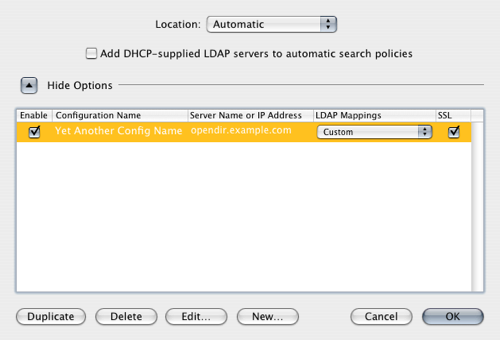
 Set the search base (see below to find out where this comes from).
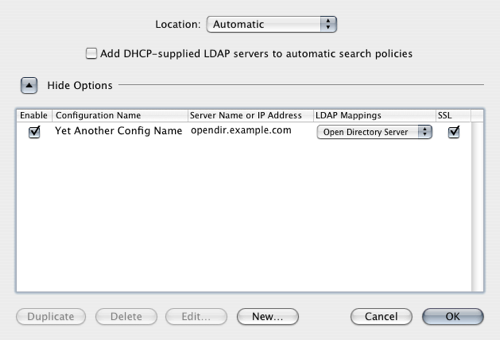 Click OK to finish!
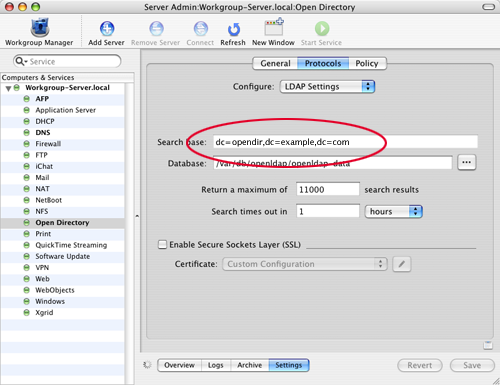
Searching for Data
The /Search node is a combined local and network node. You can view all the local and network groups with this command:ls /Search/GroupsThe next command will read all the properties of the www group:
> read /Search/Groups/wwwThe next command will list the GroupMembership property of every group:
AppleMetaNodeLocation: /NetInfo/DefaultLocalNode
GeneratedUID: ABCDEFAB-CDEF-ABCD-EFAB-CDEF00000046
Password: *
PrimaryGroupID: 70
RealName: HTTP Users
RecordName: www
RecordType: dsRecTypeStandard:Groups
SMBSID: S-1-5-21-170
> list /Search/Groups GroupMembershipAnd this command will find the any data with the property UniqueID that has a value of 0 (notice that it lists both the local user "root" and the network directory user "Administrator"):
admin root james
appserveradm james
appserverusr james
certusers root jabber postfix cyrusimap
daemon root
kmem root
operator root
staff root
sys root
tty root
wheel root
> search /Search UniqueID 0
  Users/root              UniqueID = (0)
  Users/Administrator             UniqueID = (0)
Shell Prompt vs Interactive Modes
So far I have shown interactive mode only. To convert from an interactive command to a shell prompt command, you must put the location of the datasource.Accessing the local directory using interactive mode:
<command> /NetInfo/Accessing the local directory using the shell prompt:
dscl localhost <command> /NetInfoOr the equivalent:
dscl . <command> /
Notice how "." defaults to /Netinfo.
Accessing the network directory using interactive mode:
<command> /LDAPv3/example.comAccessing the network directory using the shell prompt:
dscl /LDAPv3/example.com <command> /Or more specifically:
> read /LDAPv3/example.com/Usersvs
dscl /LDAPv3/example.com read /Users
Changing Directory Data
To add a user key/value pair (requires superuser permissions):sudo dscl append /NetInfo/Users/mac key valueCheck work with NetInfo
You can use "create" to add a new user. This does not create the entire schema for a user, just the basics. NOTE: "create" will OVERWRITE any existing node if it exists! So be careful! This example is using interactive mode:
> create /NetInfo/Users/new_userHere is an example using the shell prompt and adding specific properties:
> read /NetInfo/Users/new_user
_writers_passwd: new_user
_writers_picture: new_user
_writers_tim_password: new_user
AppleMetaNodeLocation: /NetInfo/root
GeneratedUID: 7E553B22-FE5E-4539-8CE3-73A1E4C9D959
RecordName: new_user
RecordType: dsRecTypeStandard:Users
dscl localhost create /NetInfo/Users/new_userYou can also set the password:
dscl localhost create /NetInfo/Users/new_user UniqueID 505
dscl localhost create /NetInfo/Users/new_user NFSHomeDirectory /Users/bla
dscl localhost create /NetInfo/Users/new_user shell /bin/sh
dscl localhost create /NetInfo/Users/new_user PrimaryGroup 20
dscl localhost create /NetInfo/Users/new_user RealName "New User"
> passwd /NetInfo/Users/new_userDeleting a user is a bit complex because user data is in many places. First find the group the user belongs to and remove that user from all those groups. Then find the GeneratedUID of the user and remove the password hash file from /var/db/shadow/hash/<GeneratedUID>. Then find the home dir of the user and remove that. Then it is finally ok to delete the user like this:
New Password:
dscl localhost rm /NetInfo/Users/new_userUse
dseditgroup to add groupsThere are many other ds* commands in /usr/bin and /usr/sbin. Check them out!
Wrap Up
If you ever have to work with a directory service,dscl is da bomb. Learn to use it!![]() © - University of Utah -
Marriott Library -
ITS - Apple Infrastructure
© - University of Utah -
Marriott Library -
ITS - Apple Infrastructure
Disclaimer - 295 South 1500 East, Room 1705J, SLC, UT 84112 - 801.581.6494