
Campus iPhone & iPod Touch 2.0 or later VPN Setup
By: Richard Glaser, University of Utah - Revised: 2017-03-06Attention
The University's VPN service NO longer supports IPSec for VPN access and requires the Cisco AnyConnect software be installed. University student, staff and faculty can download the software from the University's Office of Software Licensing website or by opening a web browser to the website vpnaccess.utah.edu and login with your uNID, password , and 2FA passcode.Documentation is available here:
- Marriott Library - Managing Cisco AnyConnect on Apple Systems
- UIT - AnyConnect app for iOS
- UIT - Non-specific platform VPN connections using AnyConnect
Introduction
VPNs (virtual private networks) are often used within organizations to allow you to communicate private information securely over a non-private network. You may need to configure VPN, for example, to access your email or library databases on iPhone or iPod touch.iPhone or iPod touch devices with iPhone 2.0 software or later can connect to VPNs that use the L2TP, PPTP or Cisco IPSec VPN protocols. VPN works over both Wi-Fi and cellular data network connections.
On the University of Utah campus, OIT administrates a VPN server that is available to students, staff or faculty that is configured to support the Cisco IPSec VPN protocol.
For more information on other platforms or device setup, see this OIT web page.
Automatically Configure VPN
To automatically configure the iPhone or iPod Touch to use the campus VPN, download the following file on the iPhone or iPod Touch you would like to configure.
University of Utah - iPhone VPN Profile – MOBILECONFIG-File, 4 KB
Or download the file and email it to your iPhone and then tap on the attachment to install configuration.
For other campus iOS profiles, see this web page. http://www.macos.utah.edu/documentation/administration/iOS_profile.html
Manually Configure VPN
On the iPhone or iPod Touch's home screen tap on the "Settings" icon.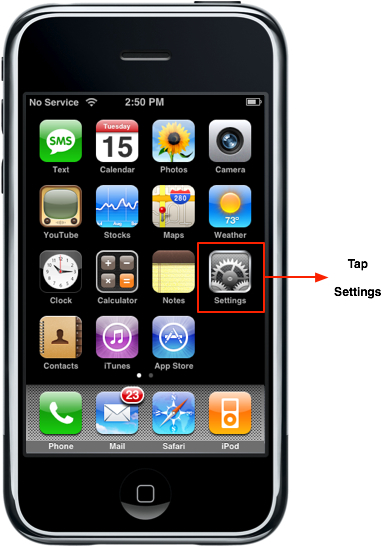
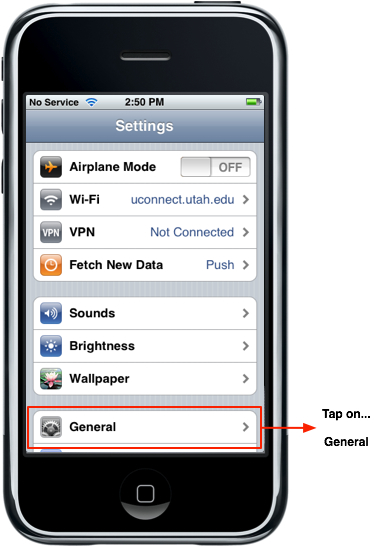
Next, tap the "General" setting.
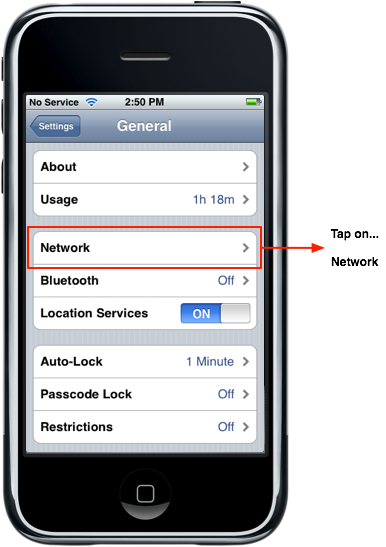
Next, tap the "Network" setting.
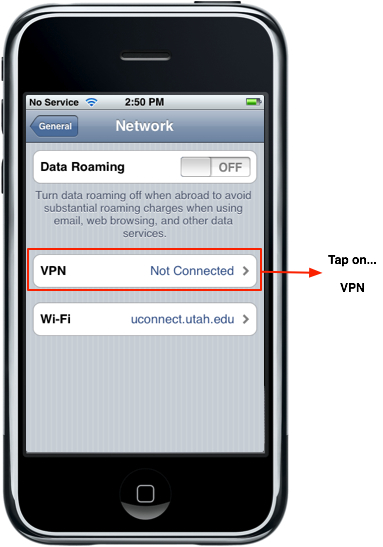
Next, tap on "VPN".
Next, tap on "IPSec".
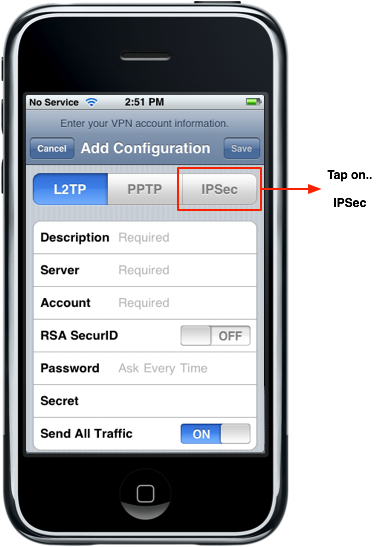
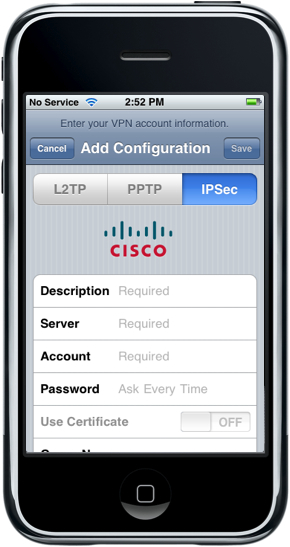
Then the following screen will display...
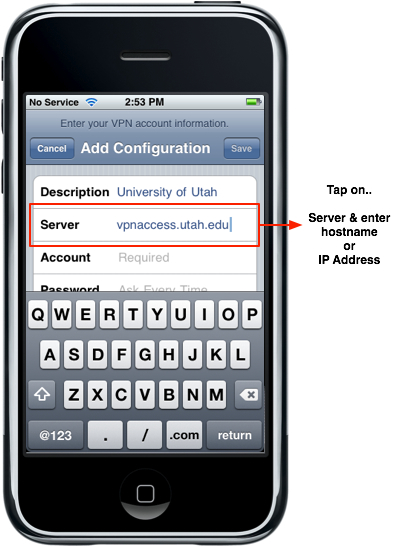
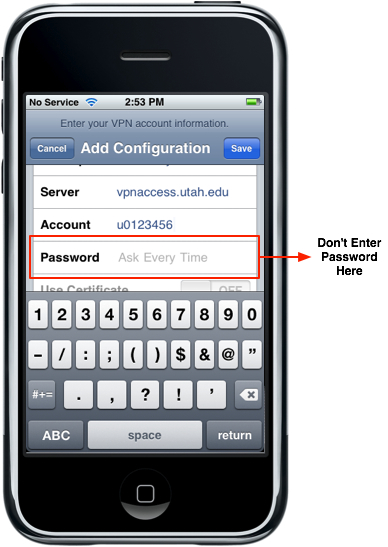
Tap on the area to the right of "Description" and enter a name for the VPN configuration, like University of Utah.

Next, enter in the OIT VPN server hostname "vpnaccess.utah.edu" or IP address "155.99.132.130".
Next, tap on "Account" and enter your uNID.
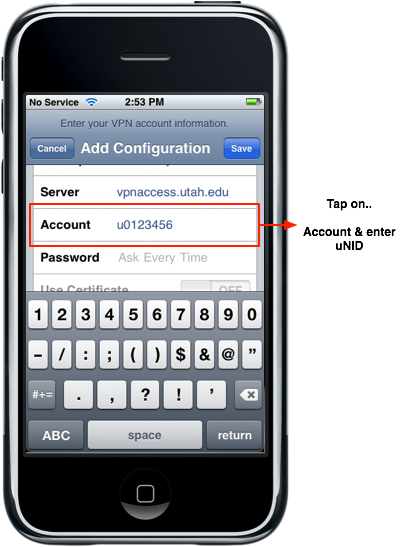
Next, you can skip entering your uNID password. You will be prompted to enter it in later when you activate the VPN connection.
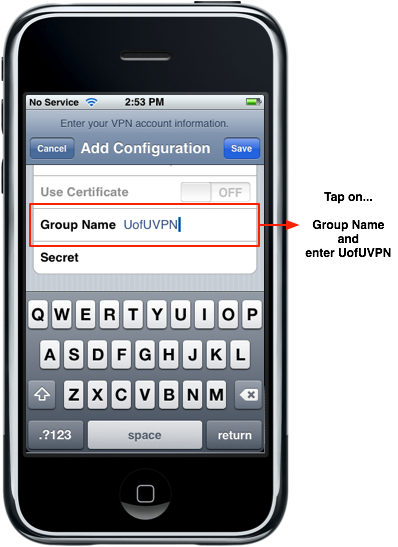
Next, enter the "Group Name"...
UofUVPN
Note, there aren't spaces in the group name and case must match.
UofUVPN
Note, there aren't spaces in the group name and case must match.
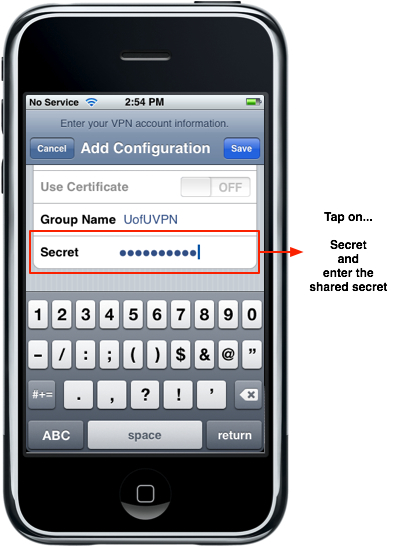
Next, enter the "Secret".
For security reasons, we cannot publish the shared secret on this web site. You can contact the campus help desk to get this information.
For security reasons, we cannot publish the shared secret on this web site. You can contact the campus help desk to get this information.
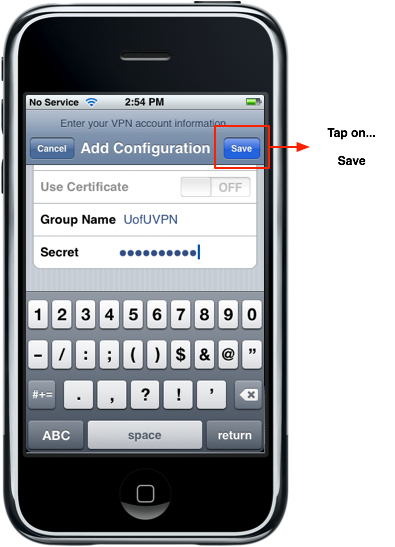
Lastly, tap on the "Save" button to save your VPN configuration.
Connect to VPN
After you have configured the iPhone to use the campus VPN, you will see the following configuration option when you go to the VPN screen. If you have multiple configurations, you want to tap on the configuration you want to use and a checkmark will display by the default configuration.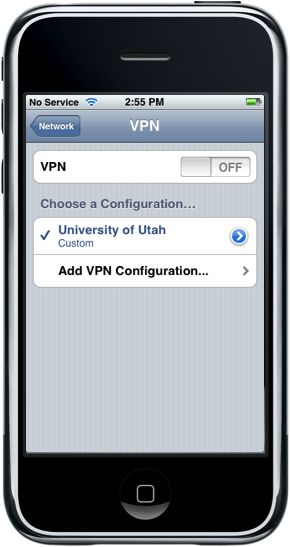
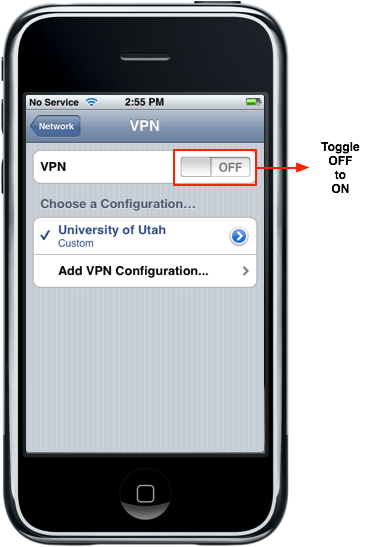
To activate the VPN connection, on the VPN option slide OFF to ON
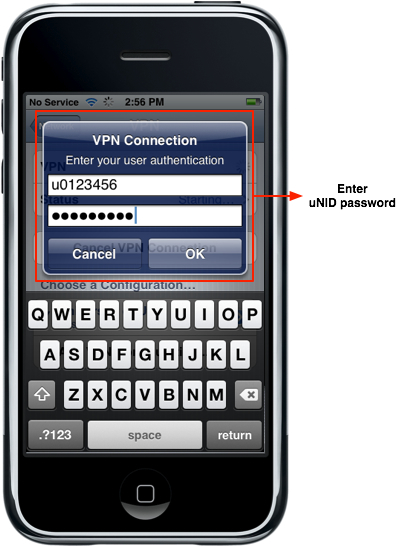
Next, you will get prompted to enter in your uNID password.
After you have successfully connected to the VPN, you will see a "Status" option which will give you connection time and other details like server, ip address, etc.

![]() © -
University of Utah
-
Marriott Library
-
Student Computing Labs
© -
University of Utah
-
Marriott Library
-
Student Computing Labs
Disclaimer
- 295 South 1500 East, Room 1705J, SLC, UT 84112 - 801.581.6494