
Stitcher 3.1 Overview
By: Scott Doenges - Revised: 2006-06-21 devin
Section Links
Using Stitcher
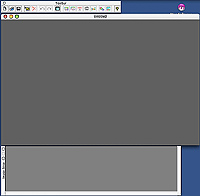 When you first open Stitcher, you're presented with a small unlabeled toolbar, and two big ominous grey windows whose functions aren't immediately obvious. The visual design of Stitcher's GUI doesn't even compare to that found in VR Worx.
After looking through the tutorial, you discover that the larger grey window is the stitching window, where you manually align the images for your QTVRs. The lower grey window is your image palette, where you'll see thumbnails of your images after loading them into Stitcher.
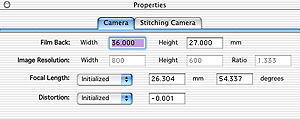
First you need to make sure your document is properly configured to your camera's characteristics. In the properties window, you can change the "film" width and height, the resolution of the images you intend to import, and the focal length and distortion of your camera's lens. Note that Stitcher can automatically adjust the focal length values, which is an incredibly nice feature.
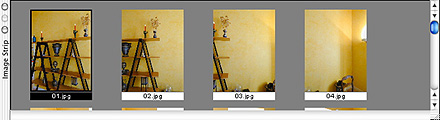
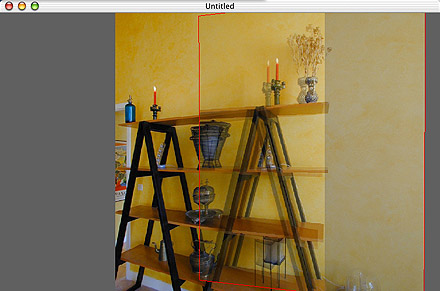
Assuming you've already shot your QTVR and made all of the necessary image adjustments (brightness/contrast, color levels, etc.), you click on the "Load images..." button to import your images into Stitcher's image palette (shown below). If you still need to rotate your images, you can do so in the image palette.
You then start by dragging your first image from the palette into the workspace, and Stitcher will automatically stick it right in the middle. When you grab your second image and drag it onto the workspace, you'll see the it go slightly transparent - this allows you to see the first image below it, so you can manually move the new image into its approximate right spot. Hit Enter, and Stitcher will stitch the images together, cutting out most differences between your images. You then use Option + Mouse to pan around 360º to place each of your remaining images. At first I was surprised by how primitive this method of image alignment seemed...
Placing your images
Once you've placed and stitched all of your images into your document, you click the "Close Panorama" button to stitch the two ends together.
Stitcher has several very handy corrective tools that can help reduce glitches in your QTVRs:
- The "Equalize" command adjusts the brightness and contrast of all of your images to approximately the same values. VR Worx has an equivalent feature - "Blend".
- The "Adjust all images" command is Stitcher's nicest feature - and one that VR Worx is lacking. It automatically readjusts the focal length and lens distortion values to best suit your QTVR, which can help your images stitch more seamlessly.
To create a Cubic VR in Stitcher, you simply pan up or down from your first row of images and start placing the upper/lower rows of images. Stitcher lets you rotate your images around any point in an image, so you can manually adjust the images to fit in place. Below is an example of rotating an image around a certain feature to align it with the same feature in the underlying image (the tip of the candle):
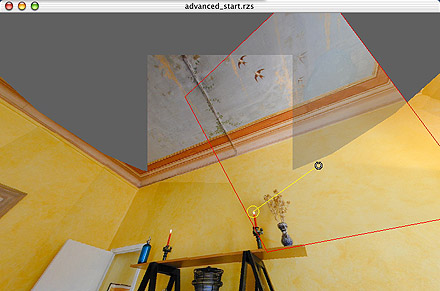
Rotating an image for a Cubic VR
Once you've placed all of the images in your Cubic VR, you'll probably notice that there's a hole in the bottom of your QTVR. Unless you can come up with a way to move your tripod out of the way and take a picture of the ground from the EXACT same spot that your camera was in for the rest of the shots, this will always be the case. Stitcher suggests using Photoshop to put your logo in this hole.
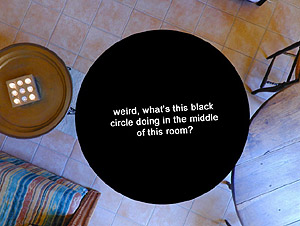
looking straight down in a Cubic VR...
The drawback to making Cubic VRs is that you need a Spherical VR tripod head, such as this one, which will cost around $600 for a fully functional head. However, since Cubic VRs are the future of QTVR, this is a big reason to
Examples
These VRs were made in Stitcher from their Tutorial files. I wasn't able to find as many image glitches/mis-matches in Stitcher's Panos as I was in VR Worx's Panos:stitcher_room_LQ.mov
–
MOV-File,
455.6 KB
stitcher_cubic_room.mov
–
MOV-File,
837.1 KB
Conclusion
Despite the obnoxious GUI, which you eventually learn to live with, I think Stitcher is superior over VR Worx for several reasons. Its ability to automatically adjust lens focal length is truly amazing and extremely useful. Stitcher is much more "hands-on" than VR Worx - at first it seems annoying that you have to manually insert and stitch each image, but the end result is better because of it.However, it lacks certain features that VR Worx includes - such as built-in Hot-Spot creation, more control over playback and appearance of the VR, Object and Scene VR creation, etc. I wish these two companies would get together and make ONE really good QTVR application!
Pros:
- Automatically adjusts the focal length and distortion values. This is really big. If you enter incorrect focal length values in VR Worx, your VR will look terrible and you'll have to start over.
- Capable of creating Cubic VRs.
- Manual image alignment and stitching produces slightly better end results.
- The GUI is fairly unintuitive.
- The buttons on the toolbar are unlabeled, and they don't even have little pop-up titles when you leave the mouse over them. I had to dig around in the documentation to figure out what they do.
- As far as I can tell, it isn't possible to make Cylindrical VRs that aren't a complete 360º view. For example, if I wanted to make a QTVR using only 6 images, with a 180º field of view, I couldn't use Stitcher.
- Unable to create and edit Hot Spots in QTVRs. You'll have to use a separate application for this. VR Worx has it built in...
- Cannot create Object or Scene VRs.
- Documentation
- Administration
- Authentication
- General Software
- Hardware
- Miscellaneous
- Multimedia
- Networking
- Operating Systems
- Outside Presentations
- Programming & Scripting
- Security
- Servers
- Short Courses
- System Deployment
- System Utilities
- What's New
![]() © - University of Utah -
Marriott Library -
ITS - Apple Infrastructure
© - University of Utah -
Marriott Library -
ITS - Apple Infrastructure
Disclaimer - 295 South 1500 East, Room 1705J, SLC, UT 84112 - 801.581.6494