
SuperDuper! - Repair Volume & Email Log Script
Revised: 2007-05-05 richardDownload Scripts
–
ZIP-File,
3.8 KB
Background
SuperDuper! is easy to use & very reliable disk copy utility, that can make fully bootable backups or you can use it scripting interface to backup sections of your file system, like users files, applications, etc.We use it to clone old to new hardware like laptops & backup critical data on volumes on file server to backup volumes on a schedule to give us flexibility of booting from our backup volume or quickly recovering data that was corrupted, modified or erased on the primary volume. Note, we still backup our data with tape backup system, but using SuperDuper! in addition has been very beneficial in some potentially bad situations.
There are some features missing from SuperDuper!, like email its logs, and checking & repairing hard disks before after clone. But, it offers a facility to run scripts before and after a copy to allow you to add your own features to it.
Script Setup
To use these scripts with your SuperDuper! clones, download the script from the link at the top of this page. There will be two scripts, "superduper_diskutil_and_mail.sh" which is the primary script, and "superduper_detached.sh" which runs the primary script in the background and is needed to get it the primary script to work properly with SuperDuper!We recommend that you copy these scripts into the directory...
/usr/local/bin
But, you can move them to wherever you want, but if you do not use this location, you need to modify the "superduper_detached.sh" and modify the path to the primary scripts location.
/path/to/superduper_diskutil_and_mail.sh &
PATH_OF_VOLUME_TO_REPAIR="/Volumes/MyVolume"
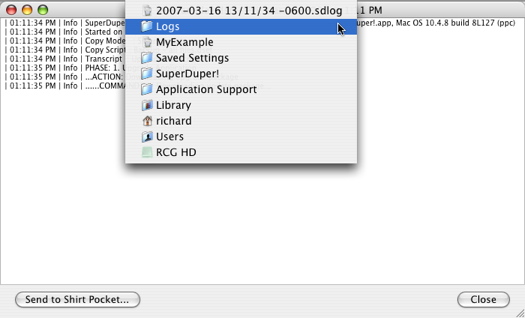
PATH_TO_SUPERDUPER_LOGS='/Users/[username]/Library/Application Support/SuperDuper!/Saved Settings/[name of settings].sdsp/Logs'
This is the path to your SuperDuper! log folder, which is dependent on your saved settings.
So, for example, I have a saved setting called "MySetting" and my username is "john_doe", the path for the variable will be.
PATH_TO_SUPERDUPER_LOGS='/Users/john_doe/Library/Application Support/SuperDuper!/Saved Settings/MySettings.sdsp/Logs'
Note, this path would be different for each saved setting, which you could use multiple versions of the script with different names or improve this script to handle multiple saved settings.
This is the default location of the scripts log file. You can change it or leave the default location.
This is the email address you want the script log, including diskutil repair & SuperDuper!'s log output.
PATH_TO_LOG_FILE="/var/log/superduper.log"
MAIL_TO='myname@mydomain.edu'
SuperDuper! Setup
Once you have the scripts setup, you will need to make a few modifications to your SuperDuper! settings to have them use the scripts properly. Launch your saved settings, change On successful completion to "Do Nothing". This is needed to have SuperDuper! continue running the scripts until they are completed.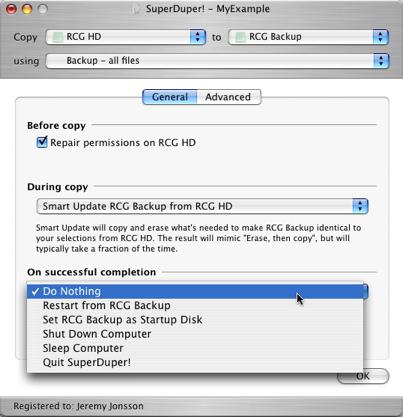
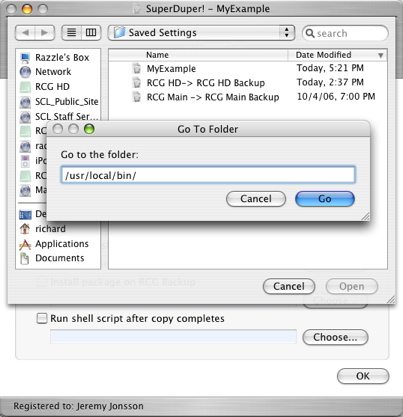
Next, click on the Advanced tab, and select "Run shell script after copy completes" and then choose the script "superduper_detached.sh". If you have it store in /usr/local/bin, you can press SHIFT+COMMMAND+G (i.e. Go to folder...) and then enter the path. Note, you can use tab completion on with the path, so, you don't have to type in the entire path.
Lastly, test your settings by cloning your volume with your saved settings.
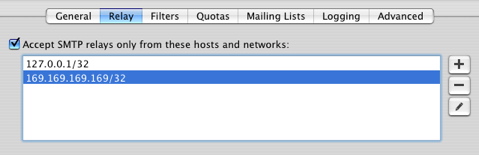
Note, if you are using these scripts with Mac OS X Server and aren't receiving the email, make sure that you have set that you have the IP address of your server entered in the Mail -> Relay "Accept SMTP relays only from these hosts and network" text field. You don't have to have mail service running, just make this change.
Note, if you are using these scripts with Mac OS X Server and aren't receiving the email, make sure that you have set that you have the IP address of your server entered in the Mail -> Relay "Accept SMTP relays only from these hosts and network" text field. You don't have to have mail service running, just make this change.
Note, you need to select the above setting, then save it, but after you have tested it you can disable the setting and it still works properly.
You can test these modifications, by using the following command...
Then you can review the mail log using Console or command line...
mail -s "Email Subject" "myname@mydomain.edu" < "/path/to/email/body/file"
Then you can review the mail log using Console or command line...
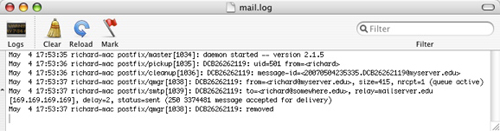
$ tail -f /var/log/mail.log
May 4 17:53:35 richard-mac postfix/master[1034]: daemon started -- version 2.1.5
May 4 17:53:36 richard-mac postfix/pickup[1035]: DCB26262119: uid=501 from=<richard>
May 4 17:53:36 richard-mac postfix/cleanup[1036]: DCB26262119: message-id=<20070504235335.DCB26262119@myserver.edu>
May 4 17:53:37 richard-mac postfix/qmgr[1038]: DCB26262119: from=<richard@myserver.edu>, size=415, nrcpt=1 (queue active)
May 4 17:53:37 richard-mac postfix/smtp[1039]: DCB26262119: to=<richard@somewhere.edu>, relay=mailserver.edu[169.169.169.169], delay=2, status=sent (250 3374481 message accepted for delivery)
May 4 17:53:37 richard-mac postfix/qmgr[1038]: DCB26262119: removed
Script Description
Here are some highlights and information about some parts of the script.![]() © - University of Utah -
Marriott Library -
ITS - Apple Infrastructure
© - University of Utah -
Marriott Library -
ITS - Apple Infrastructure
Disclaimer - 295 South 1500 East, Room 1705J, SLC, UT 84112 - 801.581.6494