
Recording Infrared Codes
By: Mikio Moriyasu - Revised: 2006-06-22 devinIntroduction
For the ZephIR to operate, the proper set of codes that match the audio and video components the user wishes to operate must be stored on the hard drive. These individual "zeeCodes", as studioZee refers to them, are the infrared signals that are emitted by a handheld remote controls when a user selects a specific function he wishes the audio or video component to carry out. A given set of zeeCodes corresponds to all of the functions that can be remotely operated for a specific audio or video component. There are two ways to obtain these zeeCodes; record them individually from the handheld remote itself or download complete sets at no cost from an online library called Webztir.Recording zeeCodes from a Handheld Remote
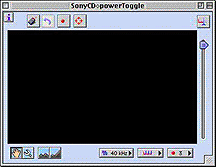
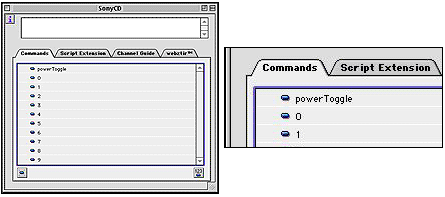
Recording a set of zeeCodes for an audio or video component is a very time intensive process that requires the use of a handheld remote and the ZephIR's infrared reception capabilities.To record a single zeeCode for a given function, select "New Component" from the "File-New" menu. This will open an "Untitled Component 1" window with a single unnamed button.

Double clicking on the button opens the"code editor" window. For the purposes of this document, only the controls necessary for the recording of the single zeeCode will be discussed.
A detailed list and description of all the "code editor" controls, their functions, and the code editor itself can be found at:
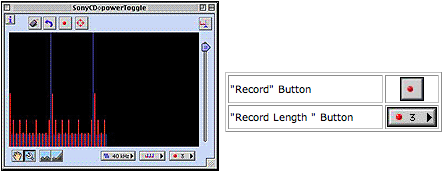
Before recording the zeeCode, the handheld remote should be placed about 6 inches away from the ZephIR. After selecting "Record", the ZephIR's red indicator light will come on indicating that it is waiting for the first "snapshot". The user pushes the function button he wishes to record on the handheld remote and holds it down until the indicator light goes off. Depending on the number of snapshots selected in the "Record Length" control, The process will be repeated anywhere from one to seven times. Once all of the snapshots have been taken, the new, individual zeeCode will be displayed in the code editor window.
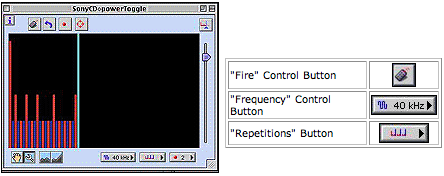
The tall blue lines represent the "end" of a single repetition of the code. In this instance, 2 1/4 repetitions of the handheld remote infrared signal have been recorded indicating that the number of snapshots was more than adequate to capture it. If no "end" was recorded, the number of snapshots taken was not enough and the "Record Length" needs to be increased.
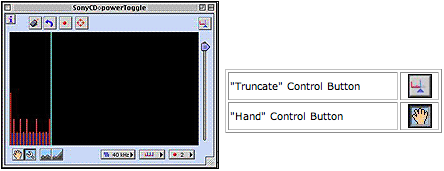
Although the signal may work with 2 1/4 repetitions, studioZee recommends that it be "trimmed" down to only one. The easiest method to accomplish this is to use the automatic "Truncate" control. Clicking on the "Truncate" button will cut the signal after the first repetition. If the end of the signal is to the far right, off of the code editor window, the signal can be moved to the left or the right using the "Hand" control.
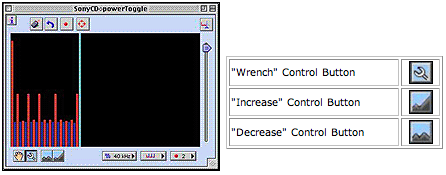
Certain zeeCodes, however, will not automatically truncate and must be manually trimmed using the "Wrench" control. This command allows the user to select the tall blue bar that represents the end of the signal. Once selected, clicking on the "Truncate" control will trim code up to but not including the highlighted bar. To get a better view of the signal, its size can be adjusted using the "Increase" and "Decrease" control buttons
All recorded zeeCodes will contain some "noise". An examination of red and blue infrared signal bars of similar heights exhibit minor variances. StudioZEE recommends that these variances be removed and the zeeCode "cleaned up" using the "Focus" slider control. By moving the slider slowly downward, the red and blue bars of similar heights will all be adjusted to the same heights.

The recorded, trimmed, and focused zeeCode can now be tested. To test all recorded zeeCodes, the ZephIR should be aimed at the desired component, and "fired" using the "Fire" button. The red indicator light will come on while the zeeCode is being transmitted. In the event the component does not respond, it may be necessary to adjust either the transmission frequency, the number of times the signal is sent, or both. These can be controlled using the "Frequency" and the "Repetitions" control buttons.
Once the component responds, the new zeeCode can be saved to the "ZephIR Browser" window for that component.
- Documentation
- Administration
- Authentication
- General Software
- Hardware
- Miscellaneous
- Multimedia
- Networking
- Operating Systems
- Outside Presentations
- Programming & Scripting
- Security
- Servers
- Short Courses
- System Deployment
- System Utilities
- What's New
![]() © - University of Utah -
Marriott Library -
ITS - Apple Infrastructure
© - University of Utah -
Marriott Library -
ITS - Apple Infrastructure
Disclaimer - 295 South 1500 East, Room 1705J, SLC, UT 84112 - 801.581.6494